
Quarter Panel & Body Panel Replacement Guide
Everything you need to know about replacing quarter panels and major body panels on VW Split Window Buses (1950–1967) and classic VW Beetles — from sourcing the right panels to understanding what professional-grade installation actually involves.
- Key Takeaways
Panel replacement on Split Window Buses and Beetles is not a bolt-on job — it’s precision metalwork that affects alignment across the entire vehicle. - Reproduction panels vary widely in quality; poor-fitting panels require correction work before installation to avoid long-term problems.
- Seam location matters enormously — a full quarter skin replacement produces better long-term results than a poorly located patch.
- All seams must be properly welded, ground, and finished — not filled with body filler to hide the gap.
Panel replacement on the Bus always requires monitoring door and window gaps to ensure the unibody hasn’t shifted during the repair process.
Understanding Panel Replacement vs. Panel Repair
The first decision in any body panel project is whether to repair the existing panel or replace it entirely. This isn’t just a cost question — it’s a quality question. A panel that’s been correctly repaired using metalworking techniques is just as good as a new panel and often better than a reproduction. A panel that’s been ‘repaired’ with inch-thick filler will fail over time, no matter how good it looks the day it comes out of the booth.
Replacement makes sense when the original metal is too compromised to repair economically — when rust has spread across most of the panel, when previous collision damage has significantly altered the panel’s structure, or when the cost of properly reshaping the original exceeds the cost of a quality reproduction section.
The Filler Test
Before any panel decision is made, we use a magnet to map the extent of existing body filler on every panel in question. On a vehicle with 1+ inches of filler, the true condition of the underlying metal is unknown until that filler is removed. We won’t quote a final number until we know what’s actually under there.
Quarter Panel Replacement on the VW Bus
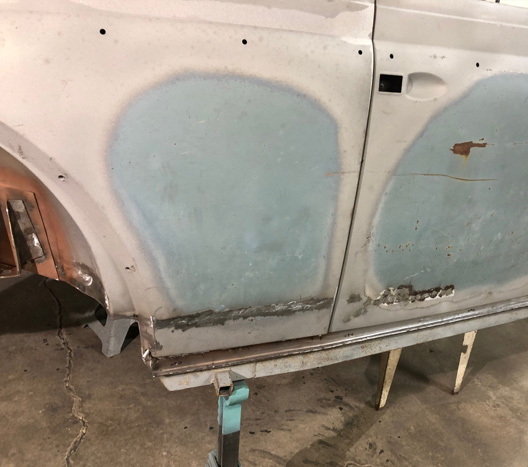
The Split Window Bus quarter panel — the large rear side section running from the B-pillar back to the engine lid — is the largest single body panel on the vehicle and one of the most frequently replaced. Rust attacks the lower corners, the rear wheel arch, and the seam at the base where the panel meets the rocker.
Why Bus Panels are particularly demanding
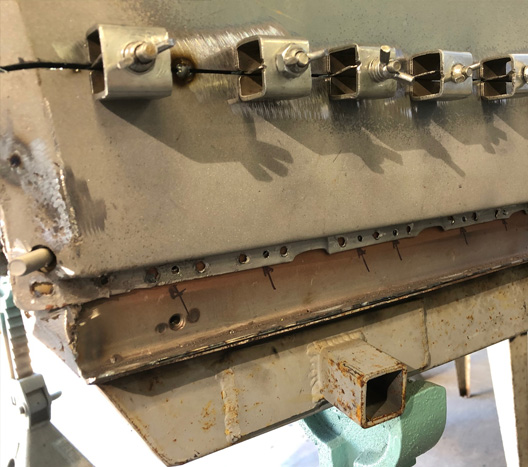
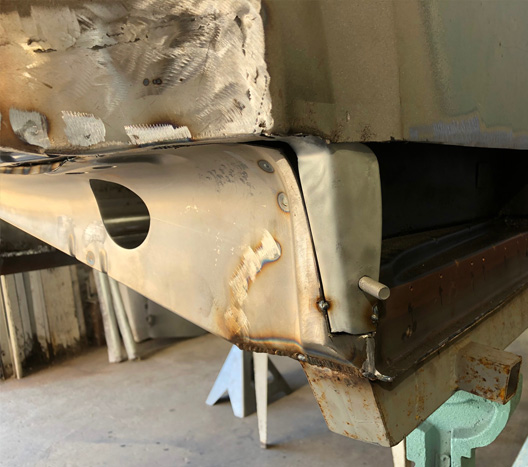
The Bus is a unibody vehicle. Cutting out and replacing a large panel section creates temporary flexibility in the structure. Doors sag, window openings shift, and the body can rack slightly if the repair sequence isn’t carefully managed. Professional Bus panel replacement involves planning the cut sequence, using body supports to maintain geometry during the repair, and continuously checking door and window gaps throughout the process. We have also developed our own corrective technique to solve for the door sag which is typical on almost all buses.
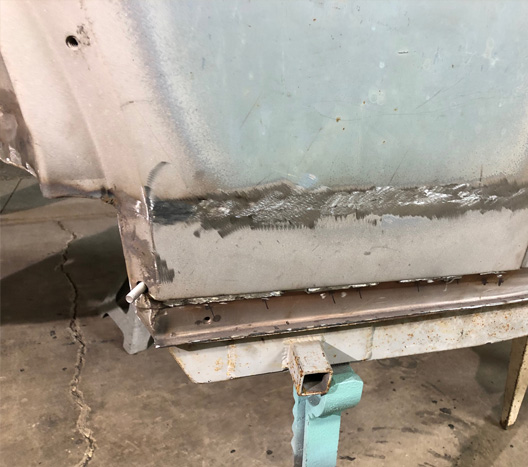
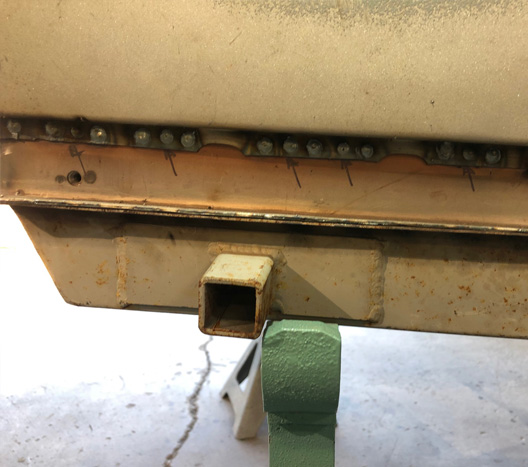
SEAM PLACEMENT STRATEGY
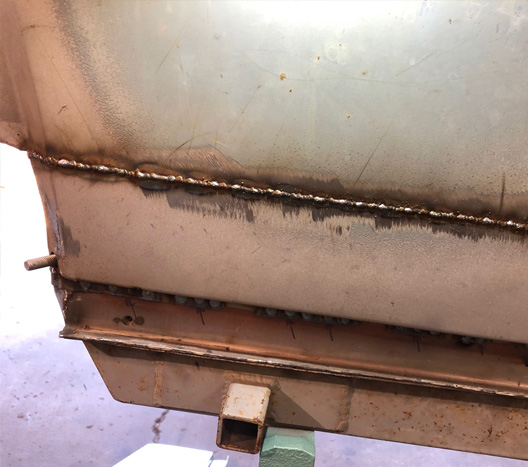
Where you put the seam on a panel replacement has a significant effect on the long-term appearance of the finished vehicle. Whenever possible, we locate seams in body character lines or in areas that will be covered by trim — seams in the middle of a large flat surface are far more likely to telegraph through paint over time. On Bus quarter sections, the preferred seam locations are at the upper line and at the base just above the rocker — both areas where factory seams already exist.
The Replacement Process
Step 1 - Support and fixture the body
Before any cutting, supports are placed to maintain body geometry. On a Bus, door gap measurements are noted as reference points throughout the repair.
Step 2 - Cut the old panel at planned seam locations
Cuts are made at the pre-planned locations — at character lines or natural body features — not arbitrarily. The cut edges are prepared for a precise butt-weld fit.
Step 3 - Correct the reproduction panel if necessary
Reproduction panels rarely fit perfectly. Minor adjustments — shrinking, stretching, profile corrections — are made before any welding begins. Trying to weld a panel that doesn’t fit correctly produces a surface that requires excessive filler. This step alone is overlooked by many body shops.
Step 4 - Weld, grind, and metal-finish
The panel is tack-welded at multiple points, gap is confirmed, and then the seam is fully welded in short sections to manage heat distortion. Welds are ground flush and the surface metal-finished to minimize filler required. Many shops don’t take the time and effort in this process and you can see it in their finished products.
Step 5 - Verify geometry and treat all new metal
Door and window gaps are re-checked against original OEM measurements. All new metal is treated from behind before any primer or finish work goes on top.
Quarter Panel Replacement on the VW Beetle
The Beetle rear quarter is a simpler structural situation than the Bus — the Beetle has a separate body and chassis — but the compound curves of the fender require skill to match correctly. Reproduction rear quarters for the Beetle are widely available and generally fit well, but the wheel arch radius, the lower rear lip, and the transition from the quarter into the rear apron all require very careful attention.
The most common Beetle quarter replacement issue we see is a wheel arch that doesn’t match the opposite side, or a panel lower edge that doesn’t flow cleanly into the rear apron. These are fit-up problems that should be corrected before welding, not afterward with body filler.
What to Watch Out For in Panel Work
Not all panel replacement work is equal. Here are the warning signs of a panel job that will cause problems down the road.
Visible waves in raking light: A finished panel should be straight and smooth. If you shine a light across it at a low angle and see ripples, there’s either excessive filler covering poor metalwork, or the seam welding distorted the panel and wasn’t corrected properly.
Cracks at the panel edges: Cracks in the paint or filler at seam lines within the first year or two indicate a lap weld or an overfilled seam that has shifted with heat and temperature cycles.
Doors or windows that don’t fit correctly: On a Bus, this is a sign that body geometry wasn’t managed during the repair. It’s a serious problem that requires significant additional work to correct.
Panel Work That Holds Up — For Decades
We take pride in metalwork that painters love and owners brag about. If you’re planning panel replacement on your Bus or Beetle, let’s talk through what quality actually looks like — and what your vehicle needs.
See Our Completed Builds
Call Us: 503-580-1228 | silverliningautorestoration.com